To add new Pseries stock click on the 'Add new stock' sub menu link under the Stock sub menu.

Add Stock Page
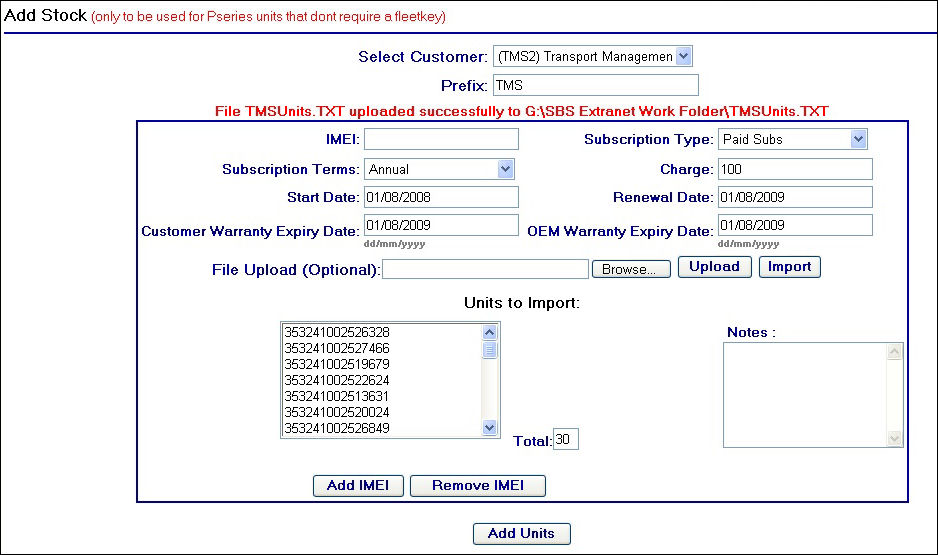
As you can see in the screen shot above, there are a number of fields present that you would have seen already on the Add Device page. For example the subscription details, warranty and notes fields.
You will also see there is an optional file upload tool, which allows you to import IMEI's from a .txt file, see 'Importing a file of IMEI's' later on in this sub topic.
To add units without the use of an external .txt file follow these steps:
| 1. | Select the customer to add the new units to from the 'Select Customer' drop down list at the top of the screen |
| 2. | Enter in a prefix which will be used in conjunction with the IMEI's to name the unit. For example prefixing the IMEI's with an abbreviated customer name such as 'TMS'. |
| 3. | Fill in the subscription details that will need to be associated with the units you wish to add. |
| 4. | Enter in any warranty and notes details that also need to associated with the unit |
| 5. | Enter in the IMEI you wish to add in the 'IMEI' text box |
| 6. | Click on the |
You should end up with a screen similar to the following:
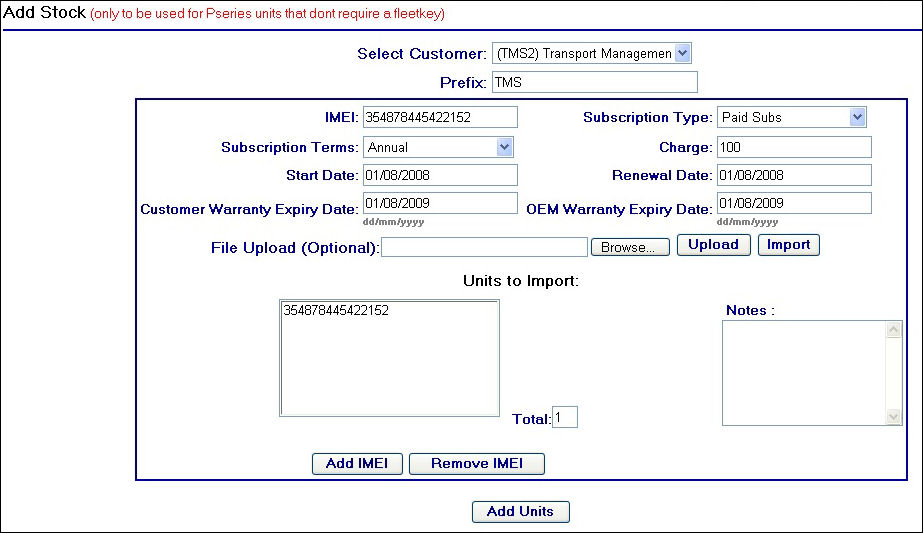
Completing the neccessary fields
| 7. | Repeat steps 5 and 6 for each IMEI you wish to add. Note this will mean any IMEI's you add to the 'Unit to Import' list box will all have the same subscription, warranty and notes details. |
| 8. | If you make an error and need to remove an IMEI from the list box, select the IMEI you wish to remove from the list box and then click on the |
| 9. | Once you have compiled your list of IMEI's to add, click on the |
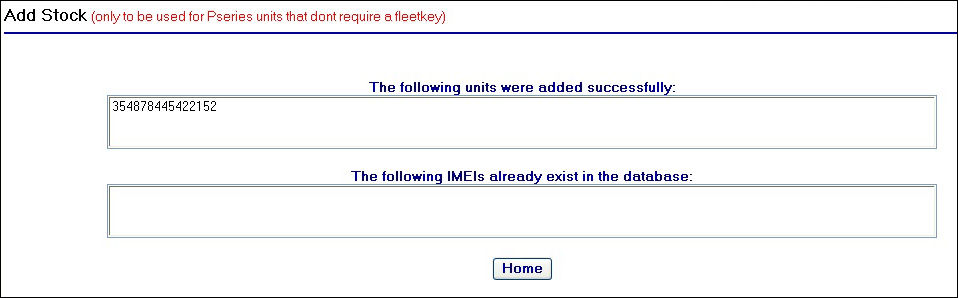
Confirmation Screen
You can see that the confirmation page has two sections, one which will list the IMEI's that were added successfully and another to list the IMEI's that have not been added due to them already being in the system.
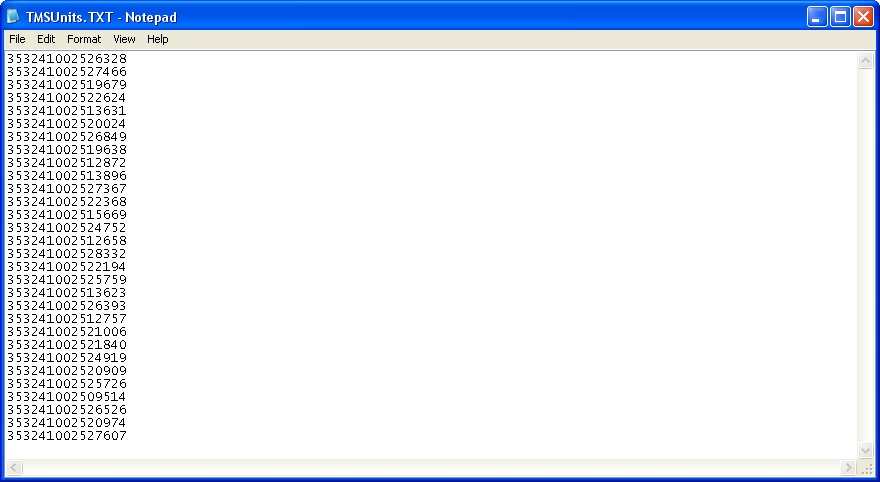
As discussed earlier, it is possible to use a .txt file containing a list of IMEI's to import into the 'Units to Import' list box.
If you wish to import a list of IMEI's, first you will need to create a .txt file in an application such as notepad:
Once you have saved the file as a .txt extension perform the following steps in the Add Stock page:
| 1. | Select the customer to add the new units to from the 'Select Customer' drop down list at the top of the screen |
| 2. | Enter in a prefix which will be used in conjunction with the IMEI's to name the unit. |
| 3. | Fill in the subscription details that will need to be associated with the units you wish to add. |
| 4. | Enter in any warranty and notes details that also need to associated with the unit |
| 5. | Click on the |
| 6. | After locating and selecting the file you wish to use, click on the |
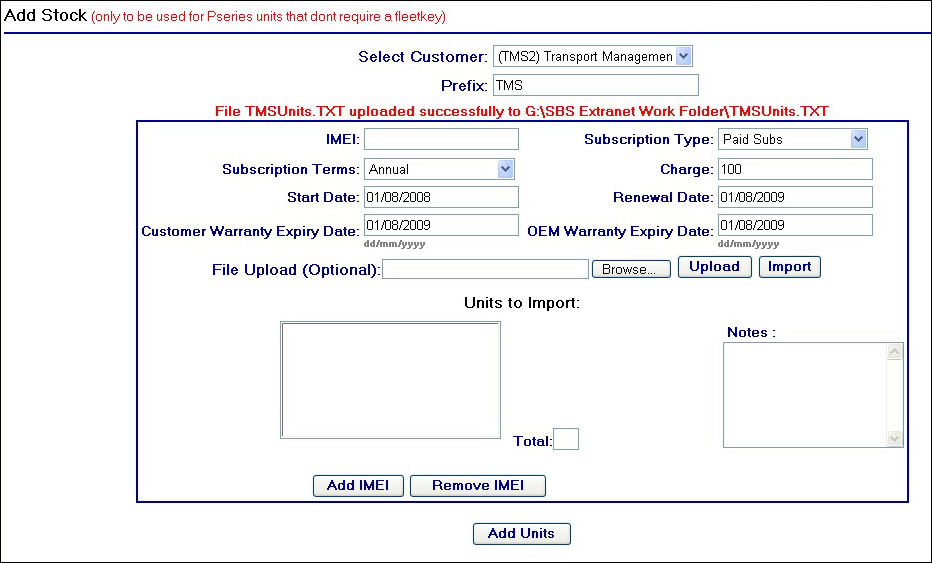
File Uploaded Message
| 7. | After uploading the file to the server, you will then need to add the IMEI's in the file to the 'Units to Import' list box. Clicking on the |
IMEI's successfully imported
| 8. | To complete the action, click on the |
| 9. | You will then be navigated to the confirmation screen, listing the IMEI's that have successfully been added to the database. |